Removing and installing RAM sticks
[WARNING] Before handling any internal components of your PC, ensure the PC is completely shutdown & disconnected from wall power.
NEVER open the power supply unit at any time as capacitors may still be holding hazardous levels of charge long after the cable is disconnected.
NEVER attempt to handle internal components while the PC is running.
Laying the PC down on its side is often the easiest way to work within a PC rather than leaving it standing where it may topple over.
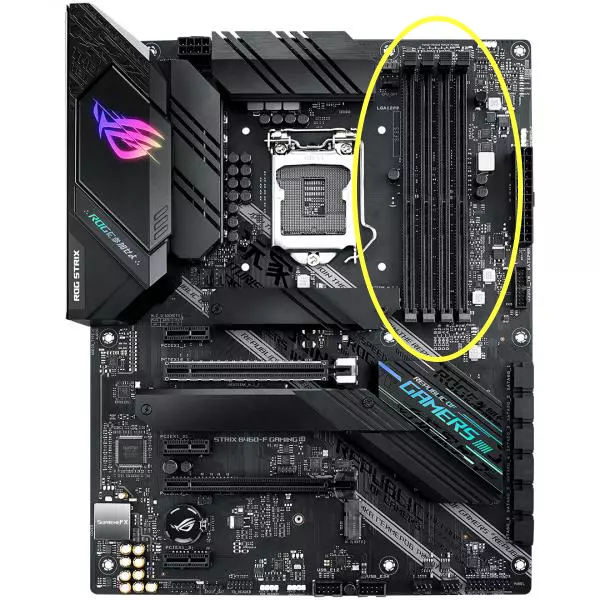
To start, carefully remove the side panel of your PC to allow you access to the motherboard, where the RAM is seated.
If you look carefully, you will see there are tabs at the end of each RAM stick (depending on your PC, you may have 2, 4, or 8 DIMMs, or RAM slots). These tabs can be pressed down to release the RAM. It's worth noting that some motherboard models only have a pushable tab at one end of the RAM stick, not both - so look out for this and don't be surprised either way. With one or both tabs pushed down, the RAM will prop itself up a little, from here, you can remove the stick carefully straight up and out of the system.
By the way: There is no benefit or downside to leaving the tab(s) open or closed when there is no RAM module in the slot, it won't make a difference either way.
Installing RAM modules
[WARNING] Before handling any internal components of your PC, ensure the PC is completely shutdown & disconnected from wall power.
NEVER open the power supply unit at any time as capacitors may still be holding hazardous levels of charge long after the cable is disconnected.
NEVER attempt to handle internal components while the PC is running.
Laying the PC down on its side is often the easiest way to work within a PC rather than leaving it standing where it may topple over.
The majority of the process here is the reverse of the above (removing RAM modules), but we'll recap a bit for clarity.
Ensure the motherboard's RAM slot tab(s) are in the open position. Before starting, check that the little notch cut out in the bottom of the RAM module matches up to the motherboard's notch - it might look like they're in the centre so orientation doesn't matter, but they are slightly off centre so it definitely does matter before pushing ahead.
It's usually best to keep the RAM sticks as level as possible while putting them into the RAM slot. Once the RAM is lined up, you will need to apply a bit of firm pressure to seat it in the slot and get the tab(s) to clip in. You can sometimes hear an audible clicking noise, at which point the tab(s) should automatically clip back in all by themselves. Once you've done both sides of the RAM stick, visually check that it matches up with the other already installed RAM sticks, and then you should be done.
I prefer a video!
A fairly comprehensive video on RAM removing and installing (you only need to watch until about 2 minutes and 50 seconds in, the rest of the video is other RAM-related content):


 6 Mediterranean Circuit, 3173 VIC
 Monday - Friday 10am-6pm
 +61 (03) 9020 7017
 ABN 83162049596
 Evatech Pty Ltd