Graphics card removal and installation
Tools required: Philips head screwdriver.
[WARNING] Before handling any internal components of your PC, ensure the PC is completely shutdown & disconnected from wall power.
NEVER open the power supply unit at any time as capacitors may still be holding hazardous levels of charge long after the cable is disconnected.
NEVER attempt to handle internal components while the PC is running.
Laying the PC down on its side is often the easiest way to work within a PC rather than leaving it standing where it may topple over.
Removing a graphics card
To do so, you'll need to power down your PC and ensure it is not plugged into any live electricity sources (as should almost always be your first step). Open your PC case cover and see whether the graphics card is seated properly in the PCI-Express x16 Slot or not.
To make sure that the graphics card is properly installed in the graphics card slot, you will need to remove the graphics card and put it back again in the PCI-Express x16 slot carefully. There is an illustration below if the dot points aren't clear enough by themselves!
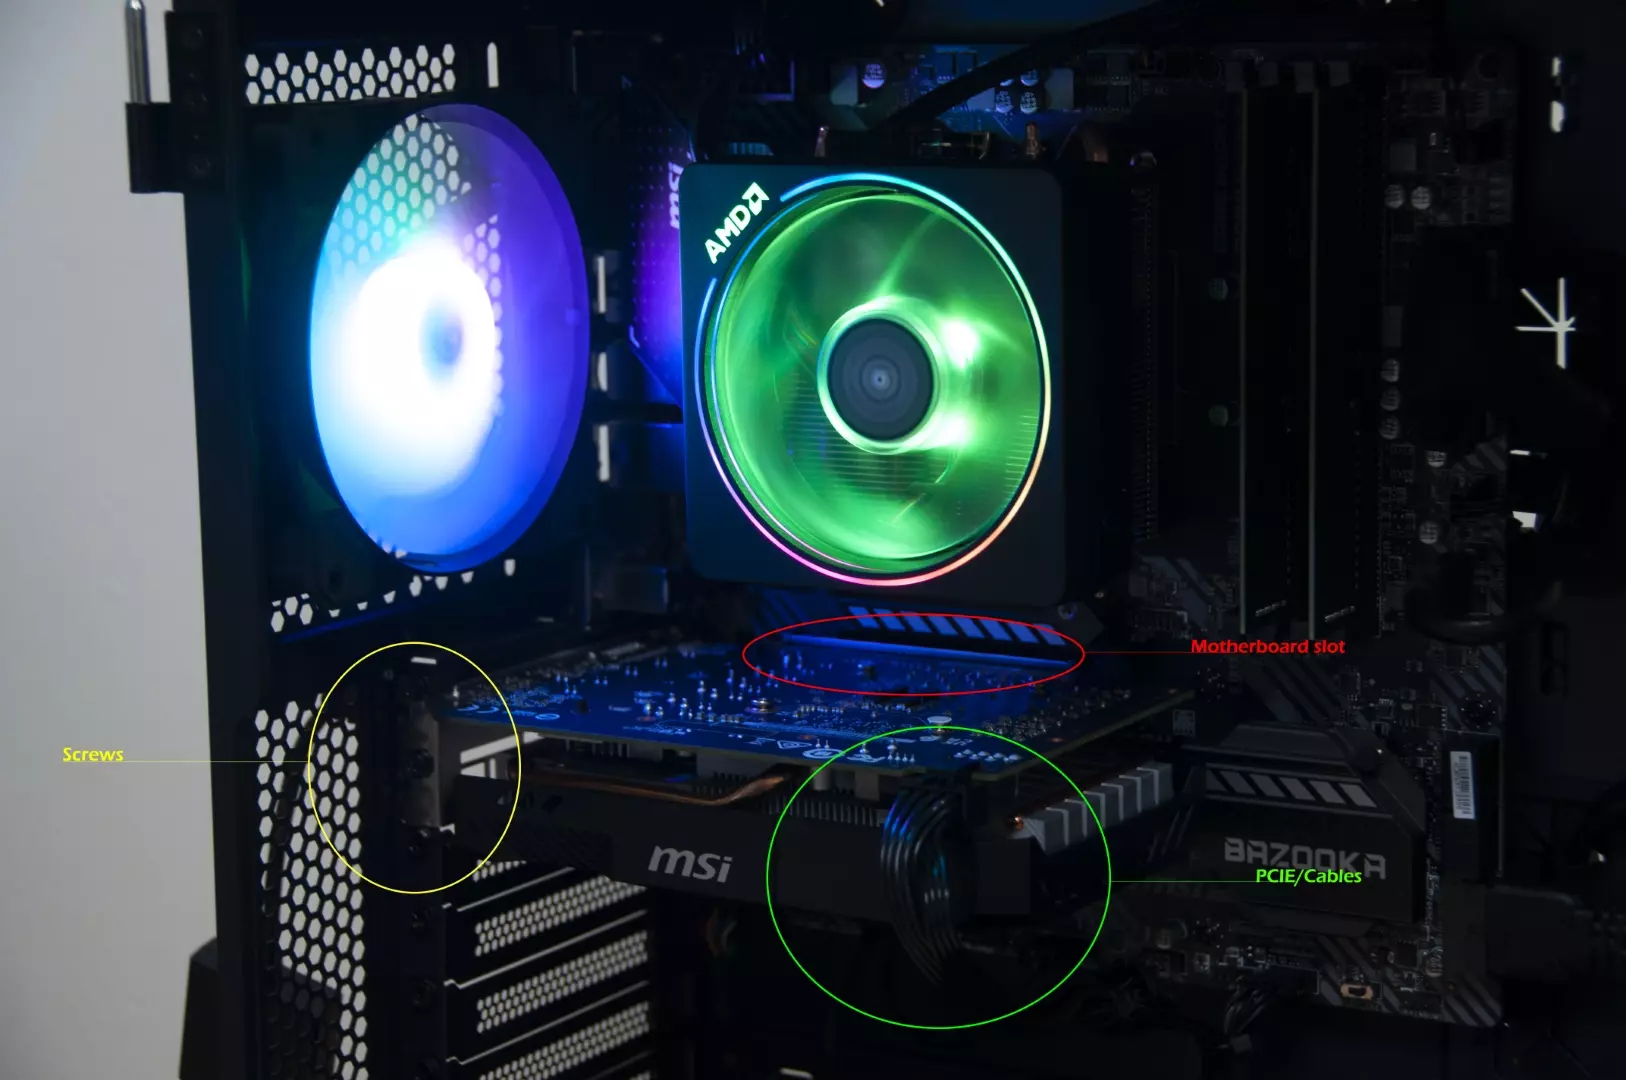
- Start by simply applying pressure to the PCIE power cable (there is a clip on the cable ending) and pull this out of the GPU. Repeat for each cable as applicable.
- Next, you will want to press down on the clip to the GPU's motherboard slot. This is generally to the right-hand side. Once this clip has been opened, we can move onto the removing the screws.
- You will need a Philips head screwdriver for this part and simply remove the screws at the end of the GPU that tighten to the PC case (see below picture for reference). Once done, you should be able to lift the GPU straight up & out.
Installing a graphics card
To install a new GPU, it will be the same steps as above just reversed. It is still recommended to place the PC on its side to avoid any possibility of toppling over.
To start, you should slide the GPU into the GPU slot on the motherboard (this should automatically make the PCIE clip latch onto the GPU), followed by connecting the PCIE power cable(s) and then screwing the rear of the GPU into place (see above picture for reference).
Still unsure, or need more visual cues? Linus Tech Tips have a great tutorial on YouTube on how to remove and install a GPU.


 6 Mediterranean Circuit, 3173 VIC
 Monday - Friday 10am-6pm
 +61 (03) 9020 7017
 ABN 83162049596
 Evatech Pty Ltd