GPU stress/load testing
Unlike trying to stress a CPU out, GPUs are a fair bit easier to put under load, but it is for certain difficult to give it a repeatable and consistent workload... so, enter GPU stress testing!
Note: Generally speaking, when running benchmarks that provide a score/ranking, you will want to close any unnecessary applications and tasks from running to give yourself the best possible chance at a good score - otherwise if something is even taking your CPU's attention, it could mean a drastically lower score than your hardware is deserving of.
3DMark
We like 3DMark because it not only runs the PC through a series of scenes that stress and test the GPU, but it also provides a score at the end. The score can be used to see where your system sits compared to others with similar hardware, or even those at the top of the leader board.
How to run 3DMark
Download 3DMark via Steam, ensuring you use the Download Demo link to avoid paying for the full version, and once installed, launch it and run either Time Spy, Night Raid, and Fire Strike, which are the three main tests included in the free version.
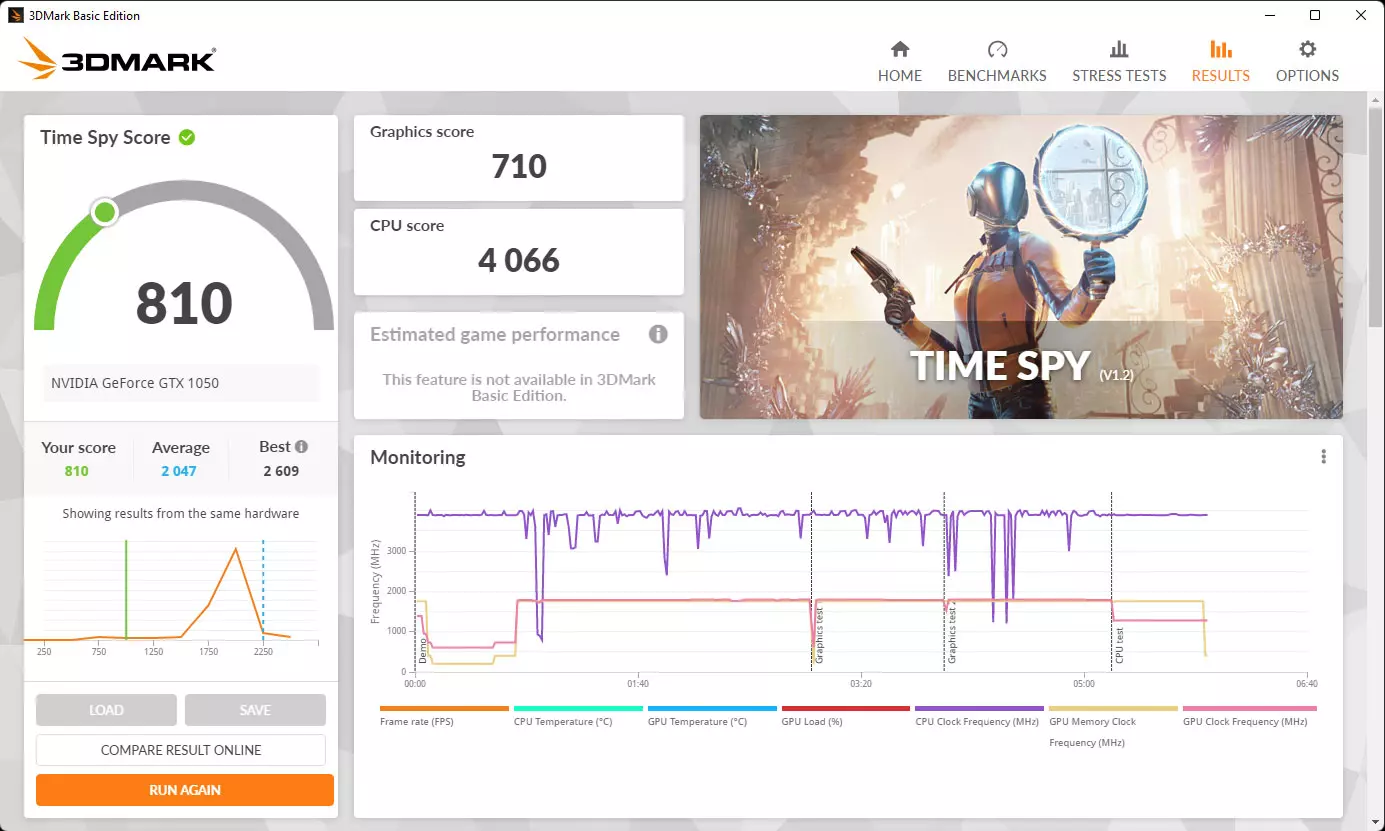
To compare your score to others with the same CPU & GPU combo, you can simply click the Compare Result Online button above the more standout orange Run Again button at the bottom left of the screenshot above, or look it up via this page, ensuring that you select the correct test from the dropdown. Just make sure you temper your expectations, because it's very likely those who are getting the top-most results are overclocking and/or spending hours on tweaks to get the best possible score!
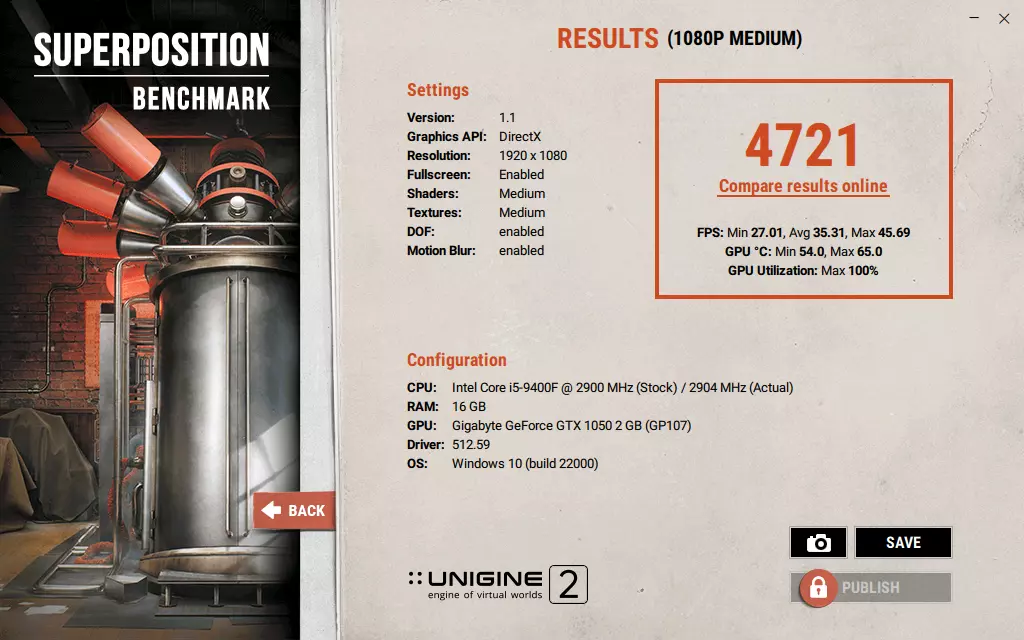
Unigine's Heaven, Valley, & Superposition benchmarks
Unigine's benchmarks have been at the forefront of GPU benchmarking/stress testing since 2007, and has been highly regarded for this practically the entire time.
Heaven, although it was released in 2009, is still useful in modern technology, with the same going for Valley although it was released in 2013. Superposition was released in 2017, but any (or all) of these can be used for stress testing purposes.
Running Unigine's tests
Once installed, launch it and configure the settings (if applicable) to your liking, then start the test.
At the end of the benchmark, you'll generally see a results/summary screen with a score and perhaps some other metrics, as below for example.
FurMark
FurMark can be used to really pin your GPU at 100%, so that over a period of a few minutes your GPU will be running as fast as its temperature throttling allows for. This test should not be used for more than 60 minutes at a time.
Running FurMark
Install via the wizard, launch the program and without changing any options just click the GPU stress test button. On the popup, just click GO! to start testing.
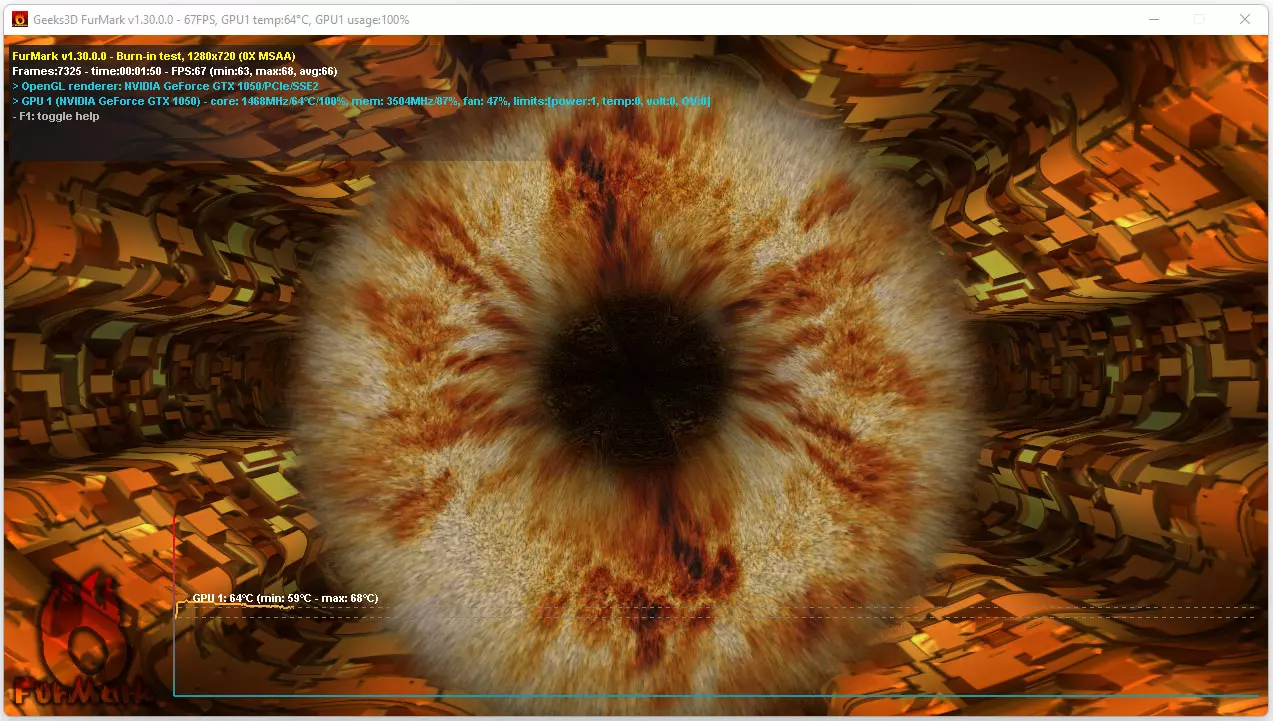
This test will not end until you quit out of it - so be sure to close it once your curiosity is satisfied as it will not provide you a summary or score of any type.
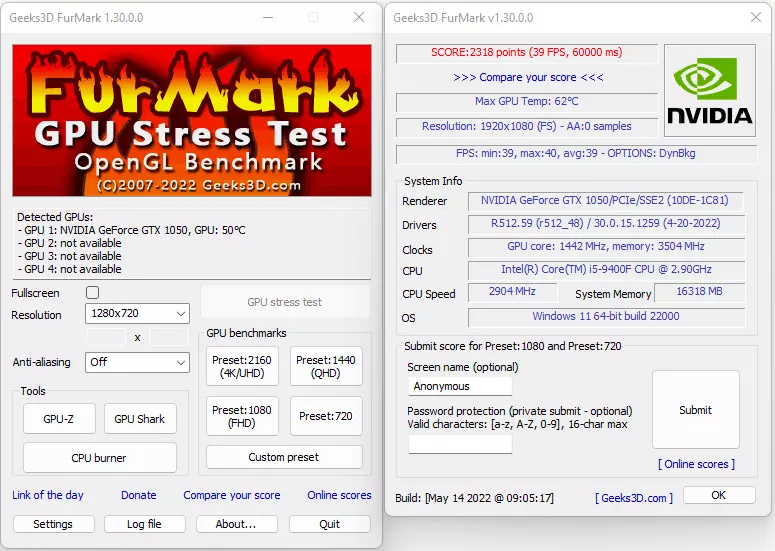
As per the image below, there are actually some benchmark options within the GPU benchmarks section of the menu (left) window at your preferred resolution, but they are fairly short-lived. They do however produce a summary & score (right), so if that is your thing: go for it.


 6 Mediterranean Circuit, 3173 VIC
 Monday - Friday 10am-6pm
 +61 (03) 9020 7017
 ABN 83162049596
 Evatech Pty Ltd